On-Point Pirouettes
On my quest to discover the secret to mastering the step, I was surprised to find that there are many valid approaches to pirouettes. Your instructor is probably teaching you one of them now! Learning her version is essential to building a strong base. But in the professional world, there are lots of ways to turn: Perhaps you’ll be dancing a Balanchine piece one day—and you’ll need the turn to go with it! So while you stick to your teacher’s approach in class, enjoy exploring other versions on your own time. Read on to learn about three different techniques for an en dehors turn, starting in croisé.

FINIS JHUNG
Master teacher Finis Jhung (a former Broadway performer and soloist with the San Francisco Ballet and The Joffrey Ballet) is known for his unique approach to classical technique, which relies on physics and anatomy. To help uncover the tools of the greatest turners, Jhung studied videos of turning wizards like Mikhail Baryshnikov in slow motion! He discovered an intermediary position (a second position plié with the weight on the front foot between the preparation and the retiré pose) that he terms “The End of the Plié.”
The Preparation:
Begin in a medium-sized fourth position, with the back/right leg straight and the front/left foot in a medium-sized plié. Your arms should be in fourth position allongé, with the left arm extended diagonally to the side, slightly behind your left shoulder, and your right arm stretched in front of you at eye level. Your head should be facing your front, right arm.
1.
Grip the floor with your supporting foot, and stretch up through your torso to better control the plié.
2.
Twist your spine to the left and send energy and weight out through your supporting shoulder to prepare for your turn to the right. “Work correctly in the preparation so that you can rest in the turn,” Jhung says.
Go to “The End of the Plié”
From your medium fourth, keep your head front. Widen your plié slightly and start rotating to the right—but stay in plié with your weight on your front foot. Continue to grip the floor with your front foot. This will take you to the “End of the Plié” with your body now in a diagonal, in a turned-out second position. Both your arms should be stretched in second position with palms down.
Jhung suggests thinking about this order of movement—toes, eyes, then arms—when completing the plié: When you are at the “End of the Plié,” the toes of your back foot push off, you spot your eyes in the mirror and then close your arms into position.
The Position
Once you’ve reached the “End of the Plié,” use all ten toes to push into the position, with your retiré toe right below the knobby part of your knee, and both hips level. Your arms should move smoothly into first position.
The Landing
Land in croisé in the same position in which you began.
WILHELM BURMANN
Wilhelm Burmann is known for his razor-sharp technique and uncanny coaching abilities. During his performance career, he danced with New York City Ballet, Frankfurt Ballet and Grand Théâtre de Genève. His Balanchine-infused style highlights a lengthened aesthetic. As Burmann notes, “Balanchine and Stanley Williams took dance and refined and enhanced the technique. It is 2009; we dance all the way from our fingertips to our toes. The ends of the body are the most sensitive, and when you are aware of these parts, the rest falls more easily into place.”
The Preparation:
Begin in a stretched fourth position, with the back/right leg straight and the left leg in a medium plié. “It’s the hands that make the movement, not the arms. If you think of the arms, you lock your back. Instead, send the energy through the arm, all the way out the hand, in a stretched fourth position” Burmann says.
The Position
From the preparation, snap the head first to initiate a solid spot, and relevé into a retiré position with toe at the knee. At the same time, move your hands through a rounded fourth and then move them quickly and smoothly to form a closed first position, with the left hand on top of the right.
1.
“The turn is not spastic,” says Burman. “If you lock, then you have to unlock at some point, which creates a jolt.”
2.
When you turn, spot the front, not the corner in which you prepared. “You are presenting to the audience, not the wings,” Burmann says.
3.
“The hip of the working leg in retiré should not lift as you move into the position,” Burmann says.
The Landing
At the end of the turn, think of staying in the retiré position for a second longer, again showing the position to the audience. Then exhale, move through passé and complete the turn in the original lengthened fourth position.
CLAUDIO MUNOZ
As ballet master of Houston Ballet II, Claudio Muñoz coaches many rising stars of the Texas company. Muñoz held the same title at the School of Ballet of the Santiago Ballet and has taught all over the world, offering his blend of refined classicism with a touch of fire from a South American aesthetic. To match his technique, Muñoz has an equally enthusiastic attitude: “In so many schools, the students are afraid to turn because the teachers want perfection,” he says. “You have to play and enjoy turns, like when you were a child!”
The Preparation:
Begin in a fourth position a bit bigger than the one you use at the barre. Both legs should be in plié, with the weight over the front leg. Arms should be in a classical fourth position with the right arm rounded directly in front of your belly button and the left arm in a rounded second position slightly in front of you. Muñoz explains, “The arms must be neutral to learn. Then you can move the arms wherever you want later on!”
The Position
From the preparation, spot with a loose neck and push into retiré with your arms in a classical, rounded middle fifth directly in front of your belly button. When moving the arms from the preparation position to the turn position, do not open the arms very wide into a full second position. Instead, just release the left arm a bit before bringing the hands closer together. “The left arm should just give a little speed and the right arm helps gather the balance,” Muñoz says.
1.
“The turns by themselves are about rhythm, and that comes from the neck and spot,” Muñoz says. “So, loosen and relax the neck muscles. Sometimes I have students say their name as they turn to release tension in the upper body.”
If available, you can try using what Muñoz calls a palito para girar (pictured), a small wooden turning paddle favored in many Latin techniques. “I was in Santiago, Chile, 20 years ago and saw a Cuban dancer do 25 turns on this little wooden thing!” Muñoz says. “This instrument helps you have the feeling of the turn and forces you to have the right, unbroken position in the lower back. I tried it and it immediately loosened me!”
The Landing
Before returning to the initial fourth position, make sure to take a breath in to linger in the retiré position. Try to control the speed of the turn by focusing on the ending in the last half of your last turn.
With tons of possibilities, enjoy playing with your pirouettes. That triple turn is closer than you think!
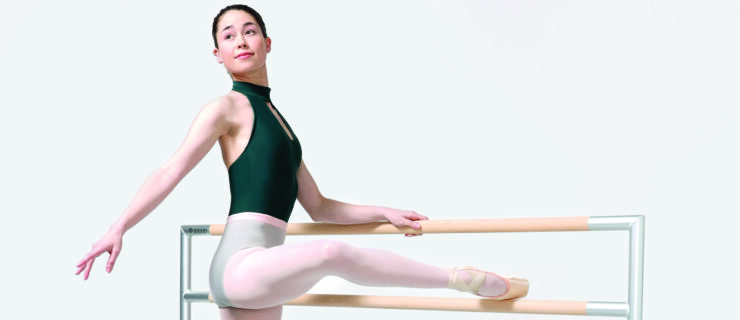
Photo: Erin Baiano
Hair and makeup: Sarah Appleby
Model: Gwynedd Vetter-Drusch


