Pointe Shoes 101

I slept in my first pair of pointe shoes. At least, I tried to sleep in them. I actually woke up in the middle of the night, ripped the Capezio Pavlovas off of my throbbing feet and threw them to the floor. But this painful (and silly) episode didn’t dampen my excitement about finally learning to dance on pointe. The next morning, I picked up those coveted shoes and practically ran to ballet class.
If you’ve just earned your first pair of pointe shoes, you’re probably as eager as I was to put them on and dance all of Swan Lake. But before you do, take a moment to read this guide for beginners. DS gathered advice from leading professionals about the way your shoes should fit, how you can shape them to your feet, and what exercises you can do to strengthen your toes and help prevent injury.
The Perfect Fit
Mary Carpenter, a professional shoe fitter in New York with over 17 years of experience, recommends following these guidelines for a successful first fit:
Make sure you go to a knowledgeable fitter and ask your teacher to accompany you, if possible. (If your teacher can’t go with you, show her the new pair before sewing on your ribbons and elastics.)
Bring whatever padding you plan to wear inside your shoes with you to the fitting. (Ask your teacher about proper padding and check out [ital: DS]’s tips in the sidebar.)
A properly fitted shoe should feel snug when you’re standing flat, with the toes touching the inside of the box—but toes should be straight, not crunched.
If you have narrow feet with long first toes, look for tapered shoes with very low profiles, or “crowns.” If you have wide feet with a long second toe or wide feet with even toes, look for a square-shaped box.
High arches need supportive shanks, but you should have enough strength to stand on your own without being propped up by the shoe.
Expect to spend 45 minutes to an hour at your first fitting and to try on many different kinds of shoes. “Your feet are just as idiosyncratic as the way your face looks,” Carpenter says. “Everybody’s face is different, and everybody’s feet are just as different.”
The Break-In
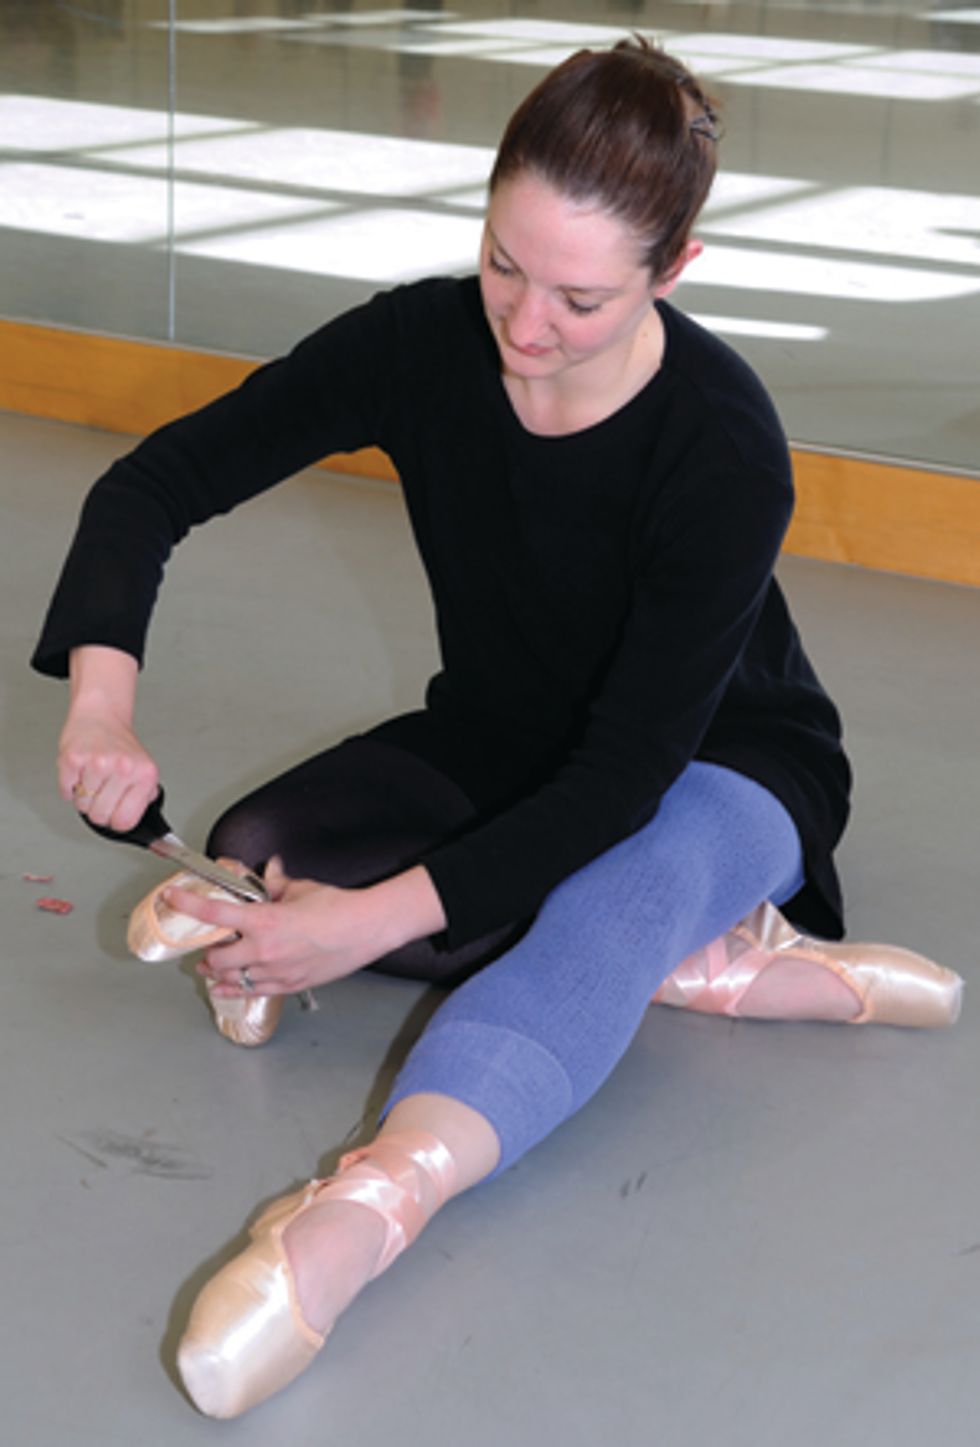
Professional ballerinas often have elaborate, personalized break-in routines (read about two principals’ rituals in the box!). But many teachers prefer that beginning students make few or no alterations to their shoes—especially since break-in tricks tend to shorten the expensive shoes’ lifespans. Ask your teacher what break-in techniques she thinks are appropriate for you. In the meantime, here are some of the more advanced techniques that professional dancers use:
To keep shoes from making too much noise, ballerinas often soften them by wetting the boxes with a little water. Then they bang the box on any hard surface that won’t leave marks on the satin.
To make room for the metatarsals, many dancers crush the boxes of their shoes with their heels or gently squish them in a doorjamb.
To accentuate their arches, the pros bend the shanks of their shoes or use a strong pair of scissors to cut the shanks at the instep.
For extra support, some dancers drip a bit of glue into the tips of their shoes or paint shellac on the shanks.
To prevent slipping, many ballerinas cut the satin off the flat platforms of their shoes and scrape grooves into the soles.
Two principal dancers reveal their break-in routines.
(Here’s what you have to look forward to when your company pays for your shoes!)
Carrie Imler, Pacific Northwest Ballet
: Carrie’s shoe has a double-layered shank. She cuts the bottom piece where her arch is, leaving the top shank intact. Then she stands on her box to flatten it before she hardens the tip and the shank with shellac. Despite all that work, she thinks of herself as more of “a put-on-and-wear-type girl”!
Melody Herrera, Houston Ballet
: Melody also likes to cut her shanks, but sometimes the cut edges dig into the bottoms of her feet. “When cut straight across,” she says, “they can be chunky and have sharp edges.” She avoids this problem by peeling apart the layers of the shank and tearing off the top ones. Then she replaces the insoles and puts masking tape over them. “That’s an easy way to customize where your shoes give you support,” Melody says. “They weaken and become very pliable.”
Strengthening
Preparing your feet for pointe shoes is even more important than preparing pointe shoes for your feet. Doing simple strengthening exercises will make the transition to pointe work easier on your ankles and toes.
At the San Francisco Ballet School, teacher Shannon Bresnahan encourages her students to use a Thera-Band, which works the foot’s intricate muscles without putting any pressure on them. “Making sure students don’t sickle their feet is the goal,” she says. She suggests sitting on the floor with both legs straight out in front of you and wrapping the Thera-Band around the metatarsals of your right foot. Hold the Thera-Band with both hands and flex your foot in parallel. Slowly angle your toes outwards, then return to parallel, keeping your alignment flat along one plane. After you’ve done three sets of 10 with your right foot and your left foot, start all over again with pointed feet.
To strengthen the tiny muscles in your toes, Leslie Hench, a teacher for 26 years at the Central Pennsylvania Youth Ballet, recommends picking up marbles with your bare feet. (She credits Marcia Dale Weary, CPYB’s founder, with this exercise.) Grab two or three marbles with your toes and drop them into a shoebox. Repeat this 10 times twice a day, and gradually increase the number of repetitions.
Once you put on your pointe shoes, don’t do anything until your teacher gives you the OK! She’ll teach you a progression of exercises designed especially for beginners. Most teachers first have students step—not relevé—up to pointe, so that they can find the correct standing position, with the weight squarely on the middle of the shoe’s platform. Hench then has her students do a series of exercises with two hands on the barre. (For example: plié, roll through your feet to pointe, plié over your toes, straighten your knees, and roll back down with straight legs.) Only after this work from two feet does Hench recommend transferring your weight to one foot.
Never try anything on your own outside of class. “That could be really damaging,” Hench says. She stresses that you have to develop strength in your ankles, abdominals and seat muscles as well as in your feet before you can perform advanced steps.
Don’t go overboard! Your pointe shoes, which now fit and are broken in perfectly, will always be there tomorrow.
The Finishing Touches
Padding:
Try one of these methods or a combination of them to see what works best (but remember to check with your teacher first):
Wrap each toe with self-adhesive tape, Band-Aids or masking tape.
Fold a paper towel around your toes. (Change it frequently to prevent shredding.)
Use a pre-shaped lamb’s wool or gel pad.
Cut the toes off thick socks and wear them under your tights.
Use a chamois (shammy). This soft cleaning fabric absorbs sweat without falling apart or feeling bulky.
Ribbons and Elastic:
Ask your teacher if she has a preference, or follow this simple guide:
Fold the heel down and sew the ribbons where the fold meets the shoe, one on each side. The elastic should be sewn just below the ribbons and stretch across the arch. To tie, cross the ribbons over the front of the ankle and continue to wrap them around in opposite directions. Tie them in a knot at the inside of the ankle and tuck them in along the groove between the Achilles tendon and the anklebone. Do not tie them directly behind or in front of the ankle, or wrap them up the calf.
Julie Diana is a principal dancer with the Pennsylvania Ballet. She has a BA in English from the University of Pennsylvania.


